Playing in the dirt

It’s the weekend in April. That means it’s time to prep the beds and get them ready for planting! Because our expanded garden last year was a gut reaction to COVID, we didn’t do much in the way of amending the soil. Between that, and the fact that we got a late start, we didn’t end up with as much production as we had hoped. This year I wanted to try my hand at no-dig gardening.

For those of you who don’t know, no-dig is a method of gardening where you don’t disturb the soil from year to year. Every year you add new compost to the top of the soil from last year. The compost provides all the nutrients your plants need, and not disturbing the existing soil is supposed to help preserve the microbes of the existing soil and create healthy plants, which in turn produces more food. I became aware of this method from Charles Dowding’s YouTube channel.

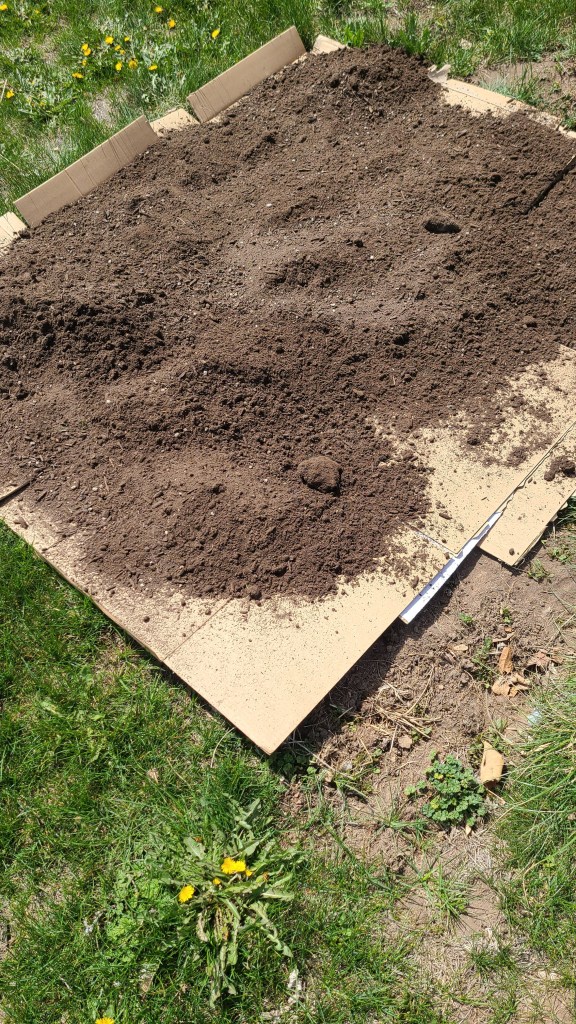
Basically, if you are starting with grass or weeds, you put some cardboard over the area that will be your garden, then you add compost to the top of it. The cardboard will block the weeds so they can’t grow, and they will eventually die because of the lack of light. And since cardboard is biodegradable, it will break down.

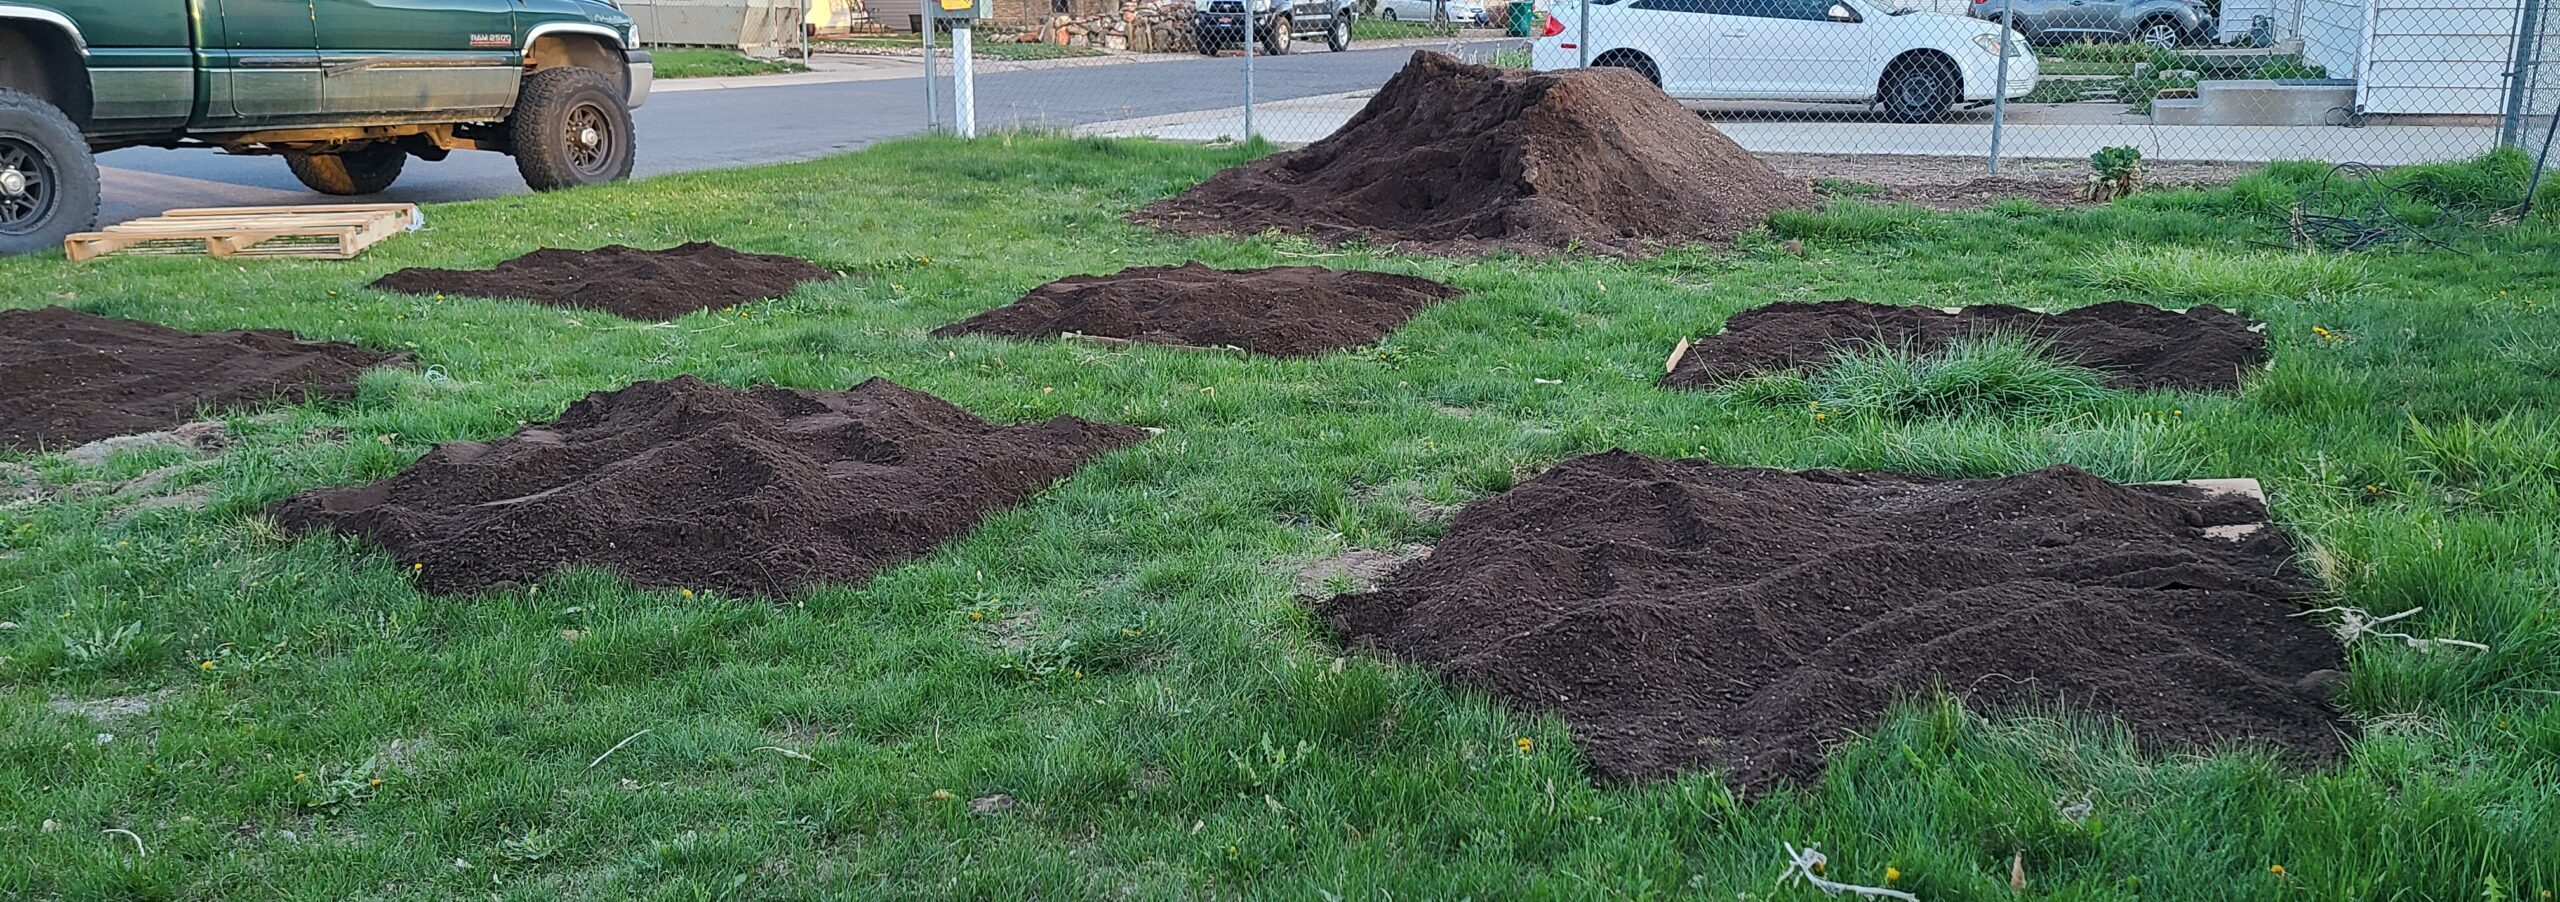
Once the cardboard is in the area you want, you cover it with compost. In our case, we are using a topsoil compost mix. We don’t make our own compost (yet) so our most affordable option was to have it delivered instead of buying a bunch of bags from our local hardware store. Depending on where you live, sometimes you can get free or cheap compost from your local landfill. It doesn’t have to cost a lot of money to get quality dirt.

No-dig experiment

No-dig is different than what we have done in the past. My grandpa was an avid gardener until he passed away and every single year he would till up his garden. I naturally did the same, but it will be interesting to see how this method goes. I have seen some pretty impressive yields with this method in comparison to the till method, but from what I have seen, it takes a few years to really see the difference.

On a personal note, today was a family affair, Elizabeth had a blast digging in the dirt. I did too if I am being honest with myself. I love prepping the garden and getting it ready for all the good food in the coming months.

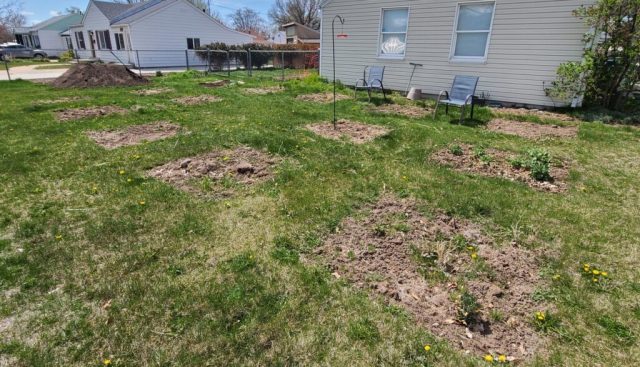
I am going to see how much of a difference the cardboard makes in weed control. I’ve added cardboard to 6 of our beds, tomorrow I’m going to weed the remaining beds and put some dirt in them. I’ll show you the progress as the year goes on.

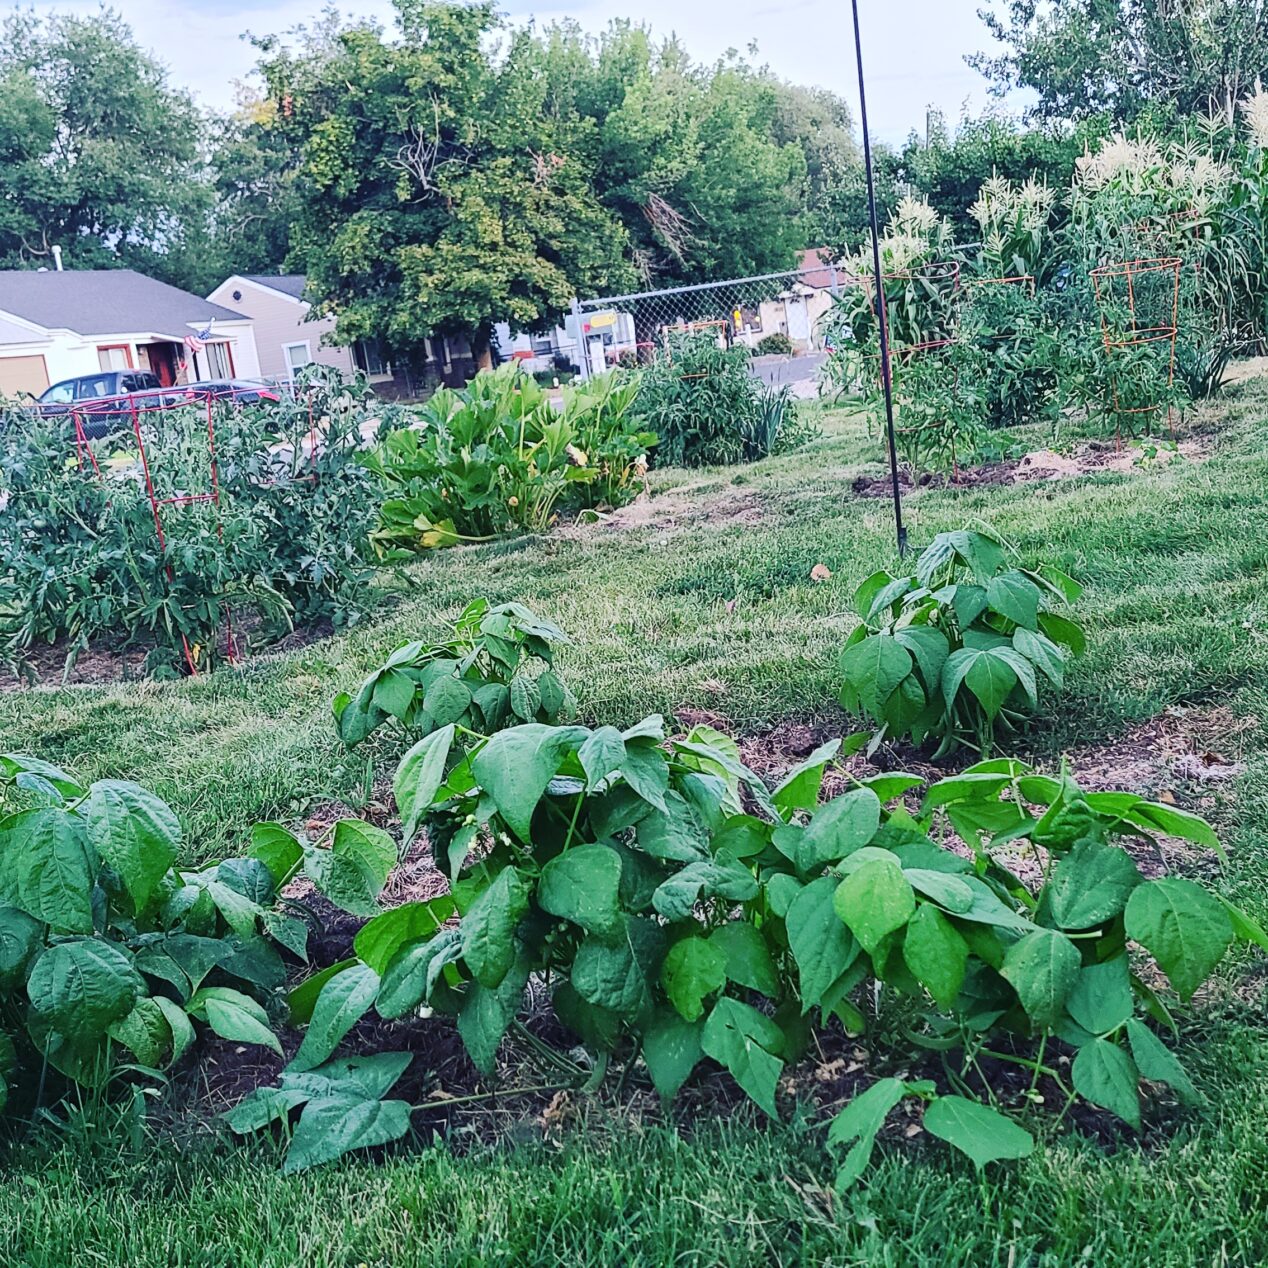
A little before and after. You can definitely see the difference in quality in the soil.

How I Plan My Garden

In my last post, I briefly mentioned that I was planning my garden. I thought I would provide a little more detail about how I’m approaching it this year. In previous years, I just planted at random. It worked fine because we were gardening in a smaller space. Last year we had so much more garden space that I just used graph paper and plotted out the garden. That worked perfectly fine. It was easy to use and a good visual. I did think I would run into some problems if I continued with that method. First, I would have to completely redo the map every year, including making the list of seeds again. Redoing the list is not a huge problem, but I am always looking for ways to streamline things. Second, I know myself and I know that no matter what I did I would struggle with keeping it in good condition, or remembering where I put it.

This year, I’m doing something a little different. I’ve created a spreadsheet. I plotted out my garden and will be adding the location of all the plants. I’ve also started putting together some basic information about the seeds I have. What you see is not the final version. This is the lazy person’s version who didn’t want to look up all the information before writing this post. I hope to make the full version available to you soon, but for now, here is a snippet of both my plot and my available seeds

My garden plot
My Garden Plot
Sample of my seed/planting guide

What I did last year is use the number from the reference column in the square foot area in my plot. I did that so I knew how much I needed to plant, but also because there was no way I could write small enough to fit the plant name in the squares of the graph paper. And let’s be honest here, even if I could write that small, who could seriously read it? The beauty of a spreadsheet is you can expand and contract the cells, or leave them as they are and just type as much as you want in each cell. I might do that for simplicity’s sake, but maybe not. I haven’t decided yet.

Last year’s garden

Now that I have the spreadsheet, let’s talk about spacing. In order to know how much you want to plant, you have to first know how much room different plants need to thrive. I’m here to say, there really is not a one size fits all approach to this. A lot of spacing requirements depends on how much time you can devote to your garden, your particular climate, soil conditions, etc. I personally use a combination of square foot gardening and the directions on the seed packet. For example, according to square foot gardening principles, you can plant 1 tomato per square foot. Generally, the seed packets I have seen will say anywhere between 18 – 36 inches. That’s a pretty big difference when you are trying to figure out how much food you can grow. I don’t always agree with the seed spacing on the packet, but it is a good idea to understand the suggested spacing so you can make an informed choice.

Let me give you an example. Determinate tomatoes have a maximum height they will grow. I don’t have to deal with suckers or the plant over-growing its support, or other things like that. So, for determinate tomatoes, I am totally fine with 1 foot of spacing between them. Of course, that is assuming I am able to give them the right amount of nutrients per plant. On the other hand, indeterminate tomatoes keep growing and producing fruit throughout the whole season. They also grow suckers, which are basically another plant that can also produce fruit. Usually, it’s a good idea to prune those off or the tomato will take over. I tend to be great about pruning at the beginning of the year, but get overwhelmed as the season goes on. I know this about myself, so I know that I need to plant my indeterminates a little further apart so they can have enough airflow.

Not to say that you can’t follow the square foot garden rules, you can, just be mindful of the nutrients you are adding back into the soil and the airflow. Especially if you are in a more humid environment. Some people use compost, which is great, some people use fertilizer, which is also great. As long as the plant is doing well and producing food, it is OK to experiment. Also, keep in mind that everyone has different conditions. Some people’s soil isn’t as nutrient-rich as others, so what works for me may not work for you. That is the trial and error part of gardening. It can be frustrating to lose some of your plants but trust me, that happens every single year.

I know that sounds frustrating and if you are anything like me, not having the exact breakdown is hard when you are first getting started. Remember that seeds want to grow and the beauty of gardening is to figure out what works the best for your garden space. Be patient with yourself, you will kill things, some things will be stunted, some things won’t produce food. This happens even in the perfect environment. Just be kind to yourself and learn to appreciate the process.

Spring Planting for my Summer Garden

I don’t know about you, but my favorite time of the year is spring. After a long winter, the birds start chirping, the plants start budding, all the smells of the spring flowers fill your senses. It just makes me happy.

With spring comes garden planning. Last year we expanded our garden. Yes, I’ll admit it was a gut reaction to COVID-19, so it was rushed together and didn’t produce much, but this year I have had time to plan, and the seed companies aren’t working double-time to get seeds out. Last year I didn’t get my seeds until the end of April, so it really stunted the growing season.

Our garden expansion ended up being 14 plots, each plot is 5×5 feet. That is more garden than we have ever had and I’m looking forward to watching it fill out. I spent a lot of time looking for food we like that will do well in our environment. Since we are in Utah, my focus was on varieties that do well in the dry heat. I think I did well for the most part, but we will find that out together.

On my sprout rack, I have some healthy-looking tomatoes, peppers, and cauliflower. All things I have grown before, but this year I’m trying a couple of new things. I started Aunt Molly’s Ground Cherries and some Gobbo Di Nizza Cardoon. Both of them I got from Baker Creek. The cardoon is supposed to be a member of the artichoke family. I love artichokes, so I’m hoping my expectations aren’t too high. The ground cherries are a sweet snack in a husk like a tomatillo. When they are ripe, they fall to the ground and you just peel off the husk and eat them. I’m looking forward to trying them both. I’ll let you know my thoughts at harvest time.

I also have several things I’m going to direct sew in the next couple of weeks, so I will update the blog as they happen.

Summer Seedlings
My summer garden
Tomato
Tomato just about ready to transplant
Some of my seedlings up-potted

I bought some of these cloth seedling bags on Amazon. In theory, they are supposed to be bio-degradable and won’t impact the root growth. I’m testing them out to see if they are all that they claim to be. So far I like the concept, but they are a little awkward to work with. Filling them up with dirt while holding it open and holding the seedlings in place took some work, but as you can see, I got it done. I can still bottom water them, and so far they don’t appear to dry out much faster. I’ll keep you posted on the biodegradability factor.

As you can see, some of these are ready to go into the ground. We are amending the soil with some compost over the next couple of weeks to help give them the nutrients they need. As soon as we can, I want to get these plants outside. Yes, you can grow things indoors for a while, but as they get bigger and you put them in bigger pots, they obviously take up more room. I am right now taking up my whole sprout rack and several feet on the floor.

Over the next few weeks, I’ll show you more of the spring prep for my summer garden.