Yes, it has been a while since I have blogged. Life is busy right now, and I’m also making this a part of my normal routine, so forgive me if I am not consistent at the beginning. I am human too and new things take time to become habit. Regardless, here I am now.
To give you an idea of what I have been up to from a personal perspective, we have been fully vaccinated! For those of you reading this years from now, this is a throwback to COVID-19 vaccinations. Since we have been fully vaccinated, we decided to risk sending E back to school. There was enough evidence to support her going back safely, and honestly, she needed to hang out with people her own age. This has been hard on so many people, but I feel for all the children who have had to deal with this.
A week back to school, and she caught something. Which, of course, ended with us taking a trip to the hospital. She ended up getting a COVID test, strep throat test, and worried parents and doctors to death. Thankfully, we were told she had strep. I am incredibly grateful for that because we as a society have been able to manage strep throat for many years. Through all this though, she kept her spirits high and is still happy to be back with her friends.
Onto the garden
From a gardening perspective, my garden is fully planted. I think I was a little late with my brassicas, but if they don’t work out, I’ll plant them again in the fall. There is a lot to talk about in relation to the garden, but for this post specifically, I want to talk about the process to harden off and give some disappointing news. First and foremost, do not skip hardening off. This is absolutely critical to healthy plants.
What is hardening off?

So, what is hardening off? To put it simply, it is a process of getting your seedlings tougher so they can handle the elements. When starting seedlings indoors, they may look great, but they can’t hold up to wind, rain, or other elements because they are sheltered. Imagine living your entire life indoors, then suddenly are suddenly stuck outside in 50 MPH wind. You are not going to be comfortable. Well, that shock can easily kill a tender young plant. Instead of shocking them out of existence, the goal is to slowly get them used to the elements.
This is a relatively simple process. All you have to do is bring them outside for a little while then bring them back inside. When I first started gardening, I heard you just leave them outside for 30 minutes a day for a week, then you plant. As I became more seasoned, I realized that just wasn’t enough. I did some research and experimenting and discovered a phased approach is the best. Some people can complete this in a week, but don’t feel bad if it takes longer because a freak storm, sickness, random road trip, or something else slows down the process. It is better to have this process take a month instead of killing all your seedlings.
And now, a simplified version for hardening off:
Step 1:
Pick a mild day and bring your plants outside for 30 minutes to an hour. How long depends on your current temperatures and what you are hardening off. For example, if the temperature is 50°F (10°C) and you are hardening off a summer crop like tomatoes, you want to lean more towards the 30-minute mark. For that matter, if you are still having consistent 50°F days, I recommend waiting to start this process for tomatoes until it warms up a bit.
Step 2:
Bring them out the next day and increase their outside time by 30 minutes to an hour. This just gives them a little more time outside to harden their stems and leaves and get used to things outside.
Step 3:
Repeat step 2 every day. Take care to expose them to different times of the day. Meaning some days bring them out at dawn, some days bring them out in the middle of the day, some days bring them out in the evenings. Each time of day exposes them to something different, and like the old saying goes, what doesn’t kill them makes them stronger. Which really is the whole point of hardening off.
Step 4:
If they have been exposed from dawn to dusk without showing signs of over-stress (losing a lot of leaves, wilting, etc.) you can leave them out for their first night under the stars. Check on them first thing in the morning to make sure they are ok. Barring unforeseen circumstances they should be totally fine to leave outside until you are ready to plant them in the ground.
Things to consider
The above steps are in an ideal world, but things happen. Pay attention to the weather. If you are supposed to get a freak hail storm, skip the day and resume it the next day. If your plants show signs of stress, back off and let them recover before starting again. As I mentioned before, there is no harm in taking longer to make sure your plants are doing well.
Make sure you set a timer so you don’t forget them. There is nothing worse than getting ready to plant the seedlings you spent so much energy growing, only to forget they are outside on day 1 or 2 and leaving them all day. I’ve done that, and most of the time they don’t survive. Timers are critical.
If you are like most people and are not lucky enough to be at home with them all day, you can do your hardening whenever you have time. If you work, you might not be able to bring them in an hour after you put them outside, or put them out at noon if you aren’t there. It is perfectly acceptable to put them out after you get off work, or before you leave. Just remember to bring them back in. I have a day job, so pre-COVID I would set them outside in the morning, bring them in, then set them out again when I came home. So they are getting that exposure twice a day instead of all at once. You can save your long exposure times for your days off.
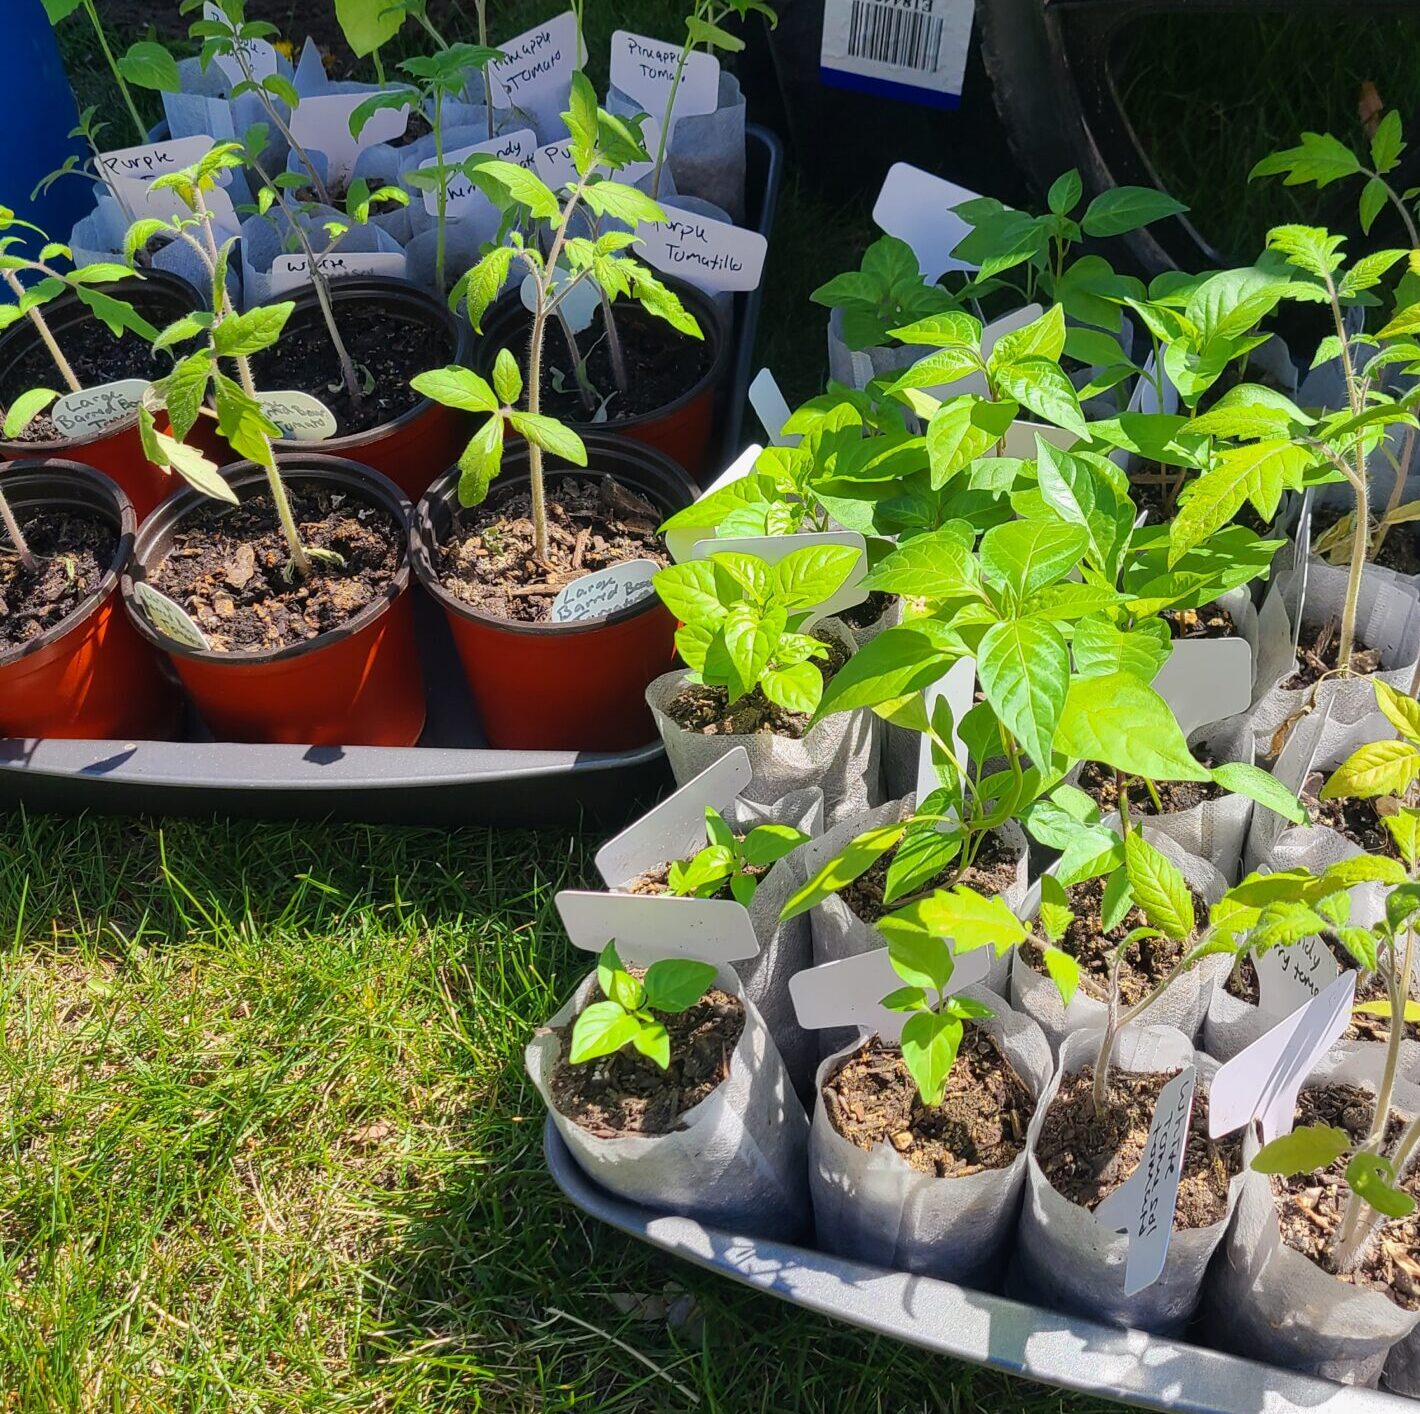
Seedling bag review
Now comes the disappointing news. In a previous post, I mentioned I bought some biodegradable bags in hopes that it would make transplanting less stressful. They did really well on my sprout rack. The bags had roots growing through them, the plants had green leaves, and were growing steadily. I was pretty happy with them. Until I started hardening them off.


Before and after hardening off. This appears to be making a recovery, but it is still disappointing.
As you can see above, the photo on the left was how my seedlings looked before hardening off, the photo on the right is how it looked after. Hardening off with these bags really took a toll. I lost several plants during the hardening-off process and a few after I planted them. It happens, some seedlings just won’t make it. But I have only ever lost that many when I did something wrong. I did exactly what I have done in previous years, but I think the bags did a major disservice. I want to give them the benefit of the doubt here though. They had some great reviews, I think it is likely my climate. We are the second driest state in the US, and I think what happened is the roots didn’t do well with the exposure.
I tried to help them recover. As soon as I noticed a problem, I backed off the hardening off process and kept them inside. After about a week of trying to get them healthy again, I realized that I just needed to get them in the ground as soon as possible. I began the hardening off process again, but this time did a quick version. They had already stayed outside for about 4 hours by the time I pulled them back in, so I started the hardening off process at 2 hours a day and increased the time by about 1.5 hours every day. Looking back, I probably could have shortened that process and gotten them in the ground much quicker, but I was panicked that all that work was going to be for nothing.
Now my cauliflower and a few other things have been in the ground for about 3 weeks, and my tomatoes and peppers have been in the ground for about a week. Having learned that the bags struggled, I took extra effort to make sure the tomatoes and peppers would remain healthy, or at least healthier, during the hardening off process, but I got the same results. Since I knew keeping them inside and trying to help them recover wasn’t going to work, I kept going with the process and got them in the ground last week. Several of them are doing well and hopefully, my next update about them will be more positive.
But for now, here are some pictures of my planted garden.


